How to Install VMware vRealize Orchestrator 7.x
NOTE – Version releases prior to 7.0.1 also allowed for a Windows-based installer. If you are still using a Windows version, you can migrate from Windows to the appliance.
For the purpose of this post, we will be deploying the Linux-based appliance and configuring vRealize Orchestrator 7.3 as a Standalone Server using vSphere Authentication.
A few prep items before we start.
- Download the vRealize Orchestrator appliance (OVA) from VMware.com.
- If you have valid vCenter or vRealize Automation licensing, Orchestrator needs no additional licensing.
- Create DNS entries for the Orchestrator appliance before the installation (forward and reverse).
Deploy vRealize Orchestrator Template
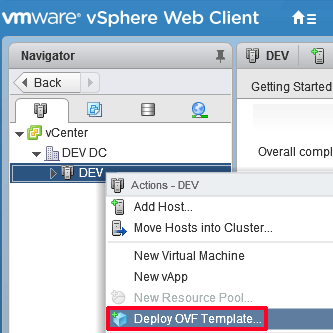
From the vSphere Web Client, right-click your cluster and select Deploy OVF Template.
Under Local File, click Browse and select the OVA.
Enter the Name for the vRO appliance and select the deployment location.
Next, select the Host or Cluster where the OVA will be deployed.
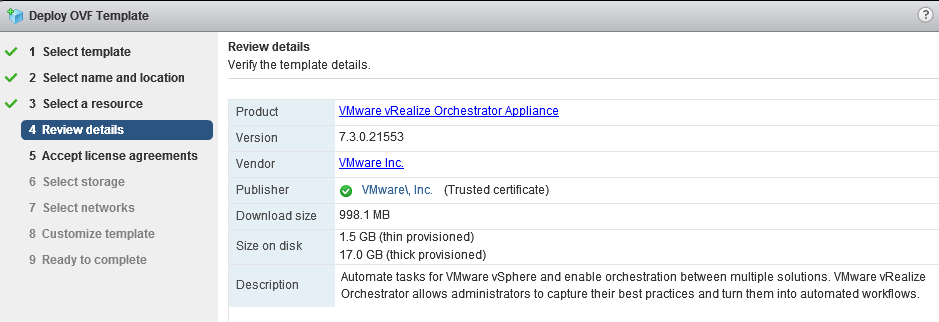
Review the template details.
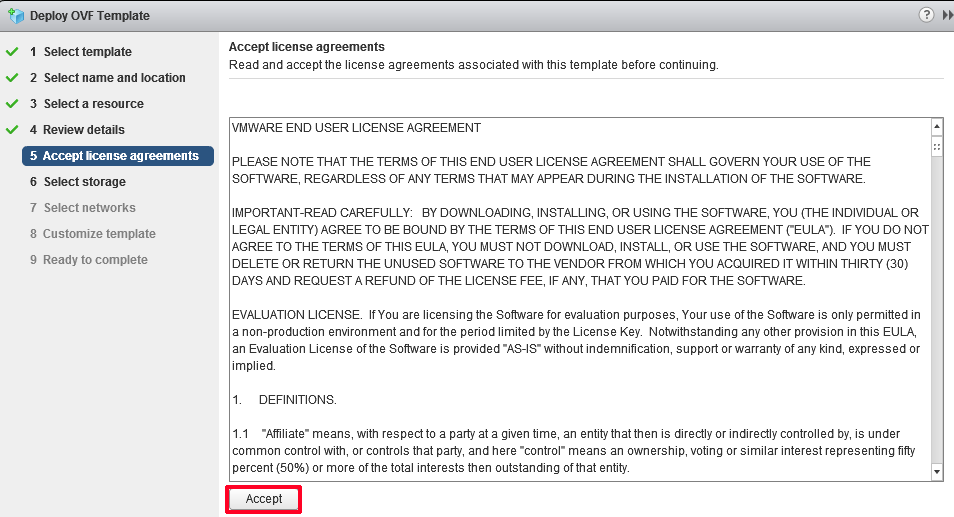
Read and Accept the EULA.
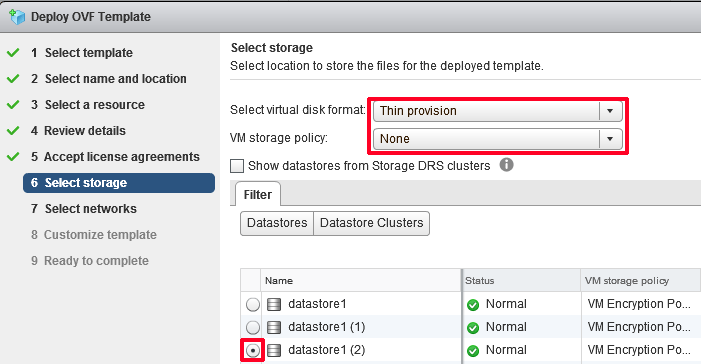
Select the Location and Virtual Disk Format.
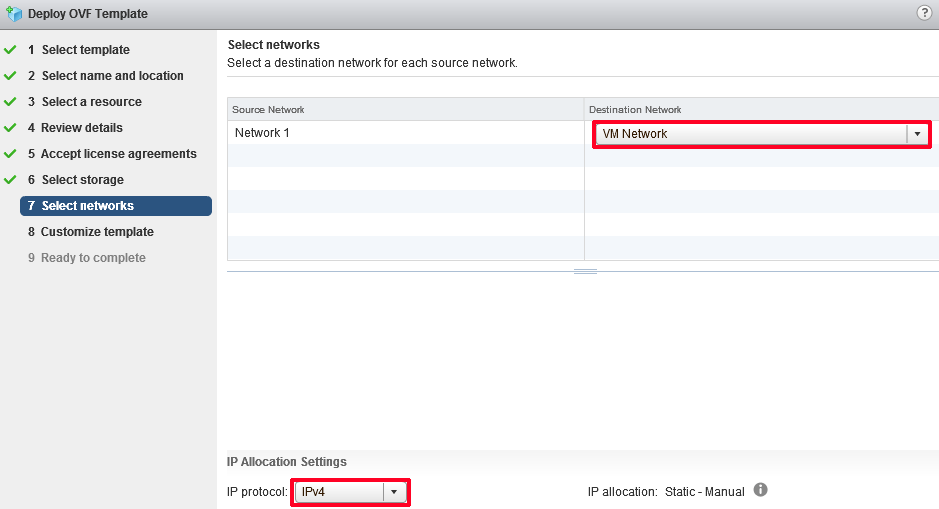
Select the Network and Protocol.
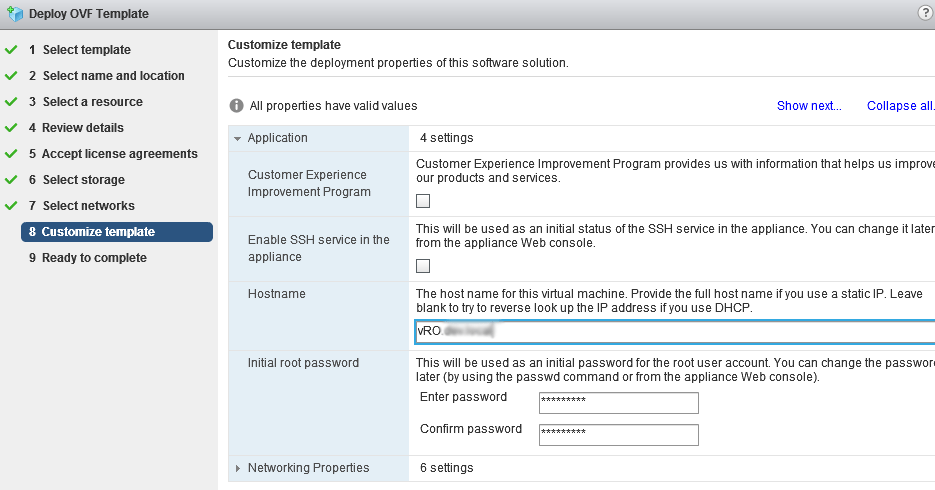
Customize the deployment properties of the vRO appliance. If you would like to statically IP the appliance, enter the pertinent information under Networking Properties. If DHCP is preferred, simply leave blank and select Next.
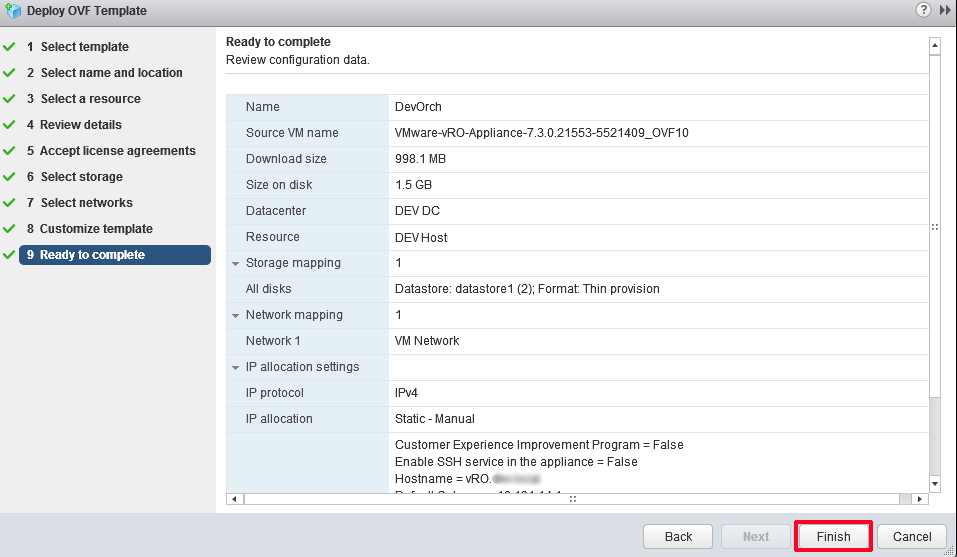
Review the configuration data and click Finish to start the deployment.
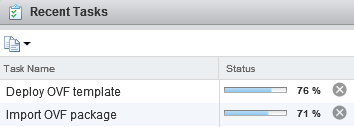
Monitor deployment status under Recent Tasks.
After the deployment, Power On the machine.
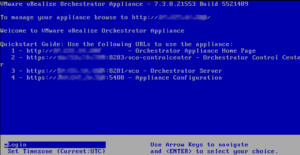
The bootstrap configuration will initiate. Open a remote console session to monitor the process. Once it has successfully booted, you will see this screen.
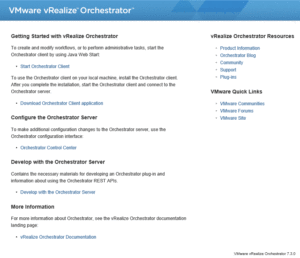
Access the Orchestrator Appliance Home Page
In a Web browser, navigate to the IP address of the Orchestrator virtual appliance.
Configure Standalone Orchestrator Server
To prepare the Orchestrator appliance for use, we will register it with vCenter SSO authentication.
From the Orchestrator Homepage, select Orchestrator Control Center or navigate to https:// orchestrator_server_IP_or_FQDN:8283/vco-controlcenter. Log in as the root account with the password you specified during OVA Deployment.
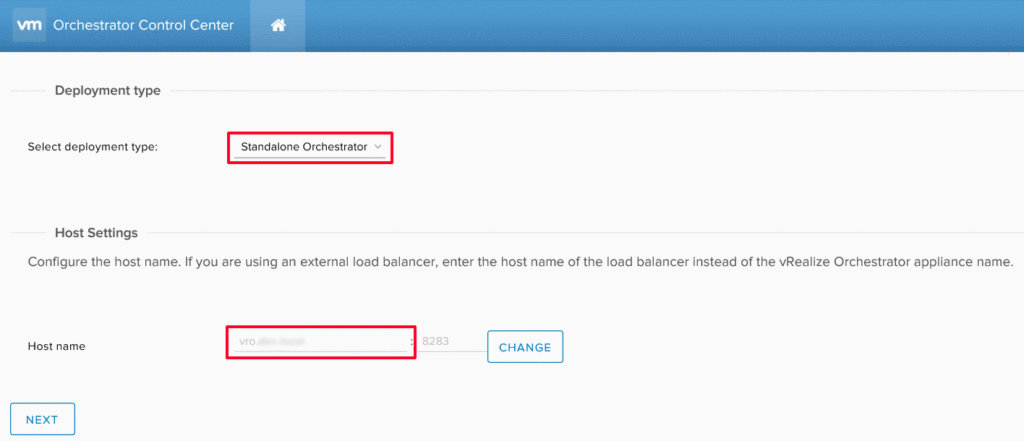
Under Deployment Type select Standalone. Ensure the Host Name is correct and click Next.
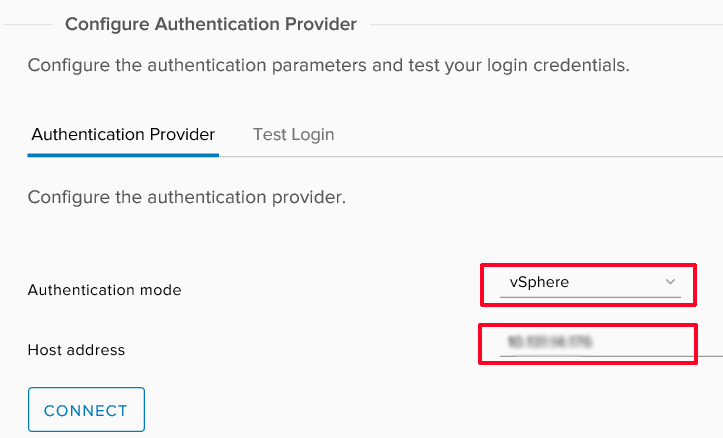
Choose vSphere for the Authentication mode. Enter the Address of the Platform Services Controller and click Connect.
Orchestrator will presesnt a certificate. Click Accept Certificate to continue.
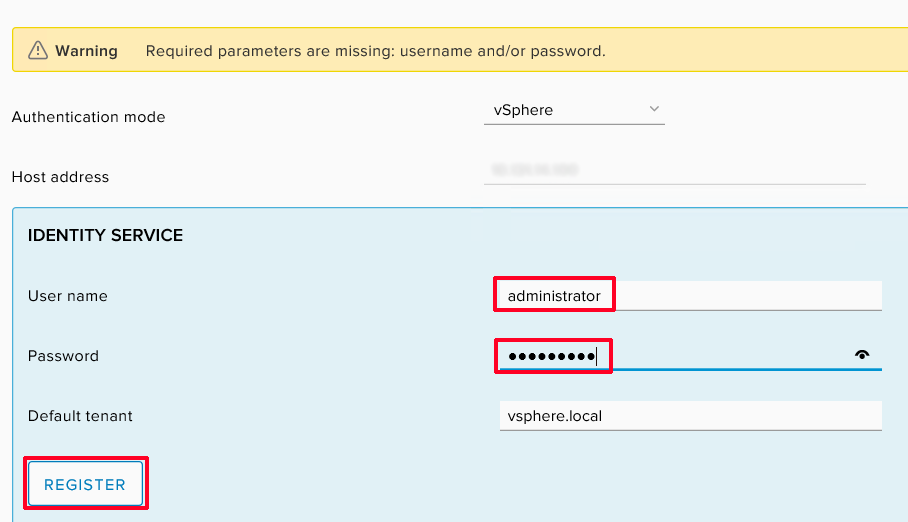
Enter the User Name and Password of the vCenter SSO Account. Click Register.
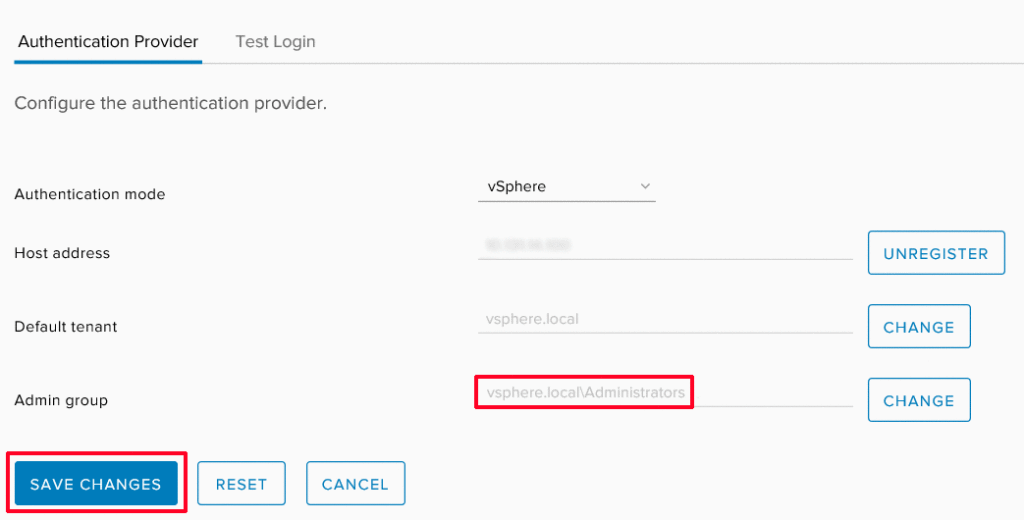
After registration, Orchestrator will prompt you to enter an Administrators group. Enter the name of your admin group and select Search. Since our testing is in Dev, we will add the local Administrators group.
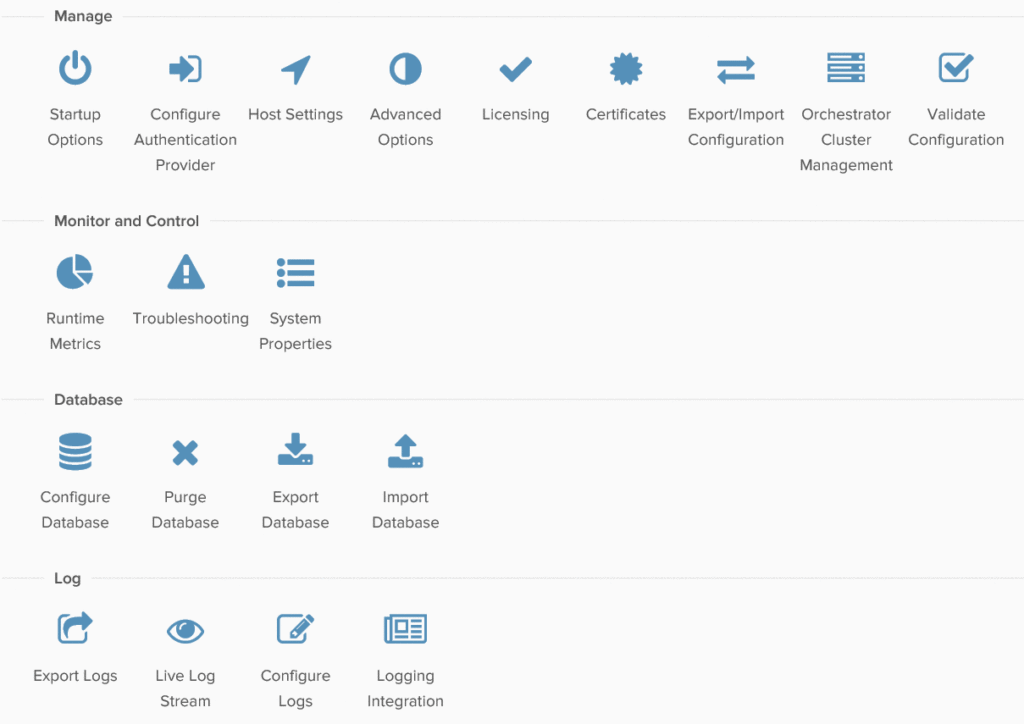
Finally, you will land on the Orchestrator Control Center Homepage. From this page, you can perform additional configuration or administrative tasks on your Orchestrator appliance.
Access vRealize Orchestrator Client
Once the configuration is complete, you can access the Orchestrator client to start deploying workflows. From the Orchestrator Homepage (https://your_orchestrator_server_IP), select Start Orchestrator Client.
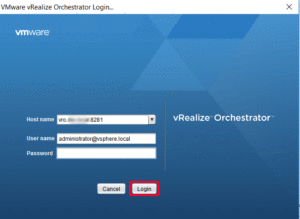
Log into the Orchestrator client with the SSO credentials.
You can now begin creating and editing workflows.
Official documentation on installing and configuring vRealize Orchestrator 7.3 can be found here.
Additionally, if you are new to Orchestrator, I found this VMware vRealize Orchestrator Cookbook extremely helpful.
