Configure vCenter High Availability
How does it work?
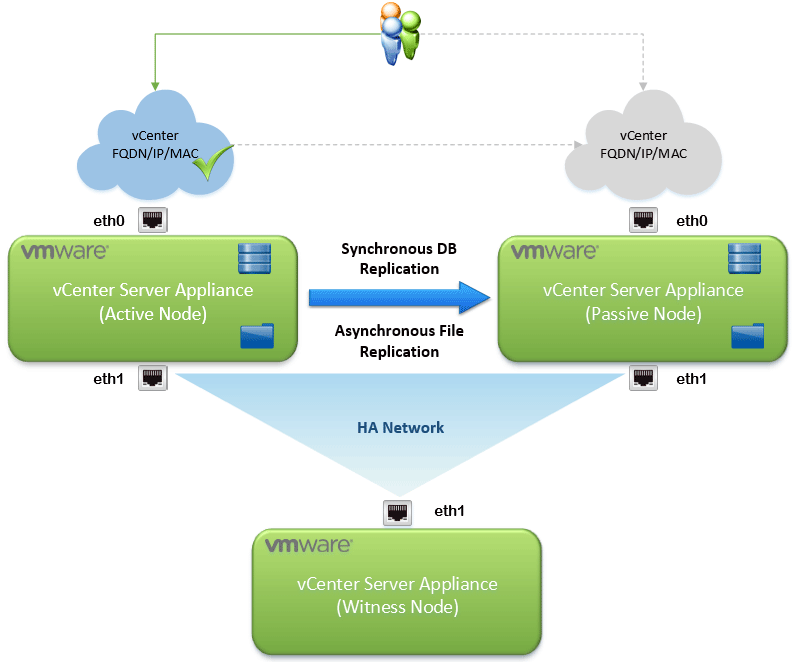
The VCHA deployment is comprised of three nodes; active, passive and witness. The active node is just that, the active vCenter Server Appliance instance. This node has two interfaces; a standard management interface (eth0) and an HA network interface (eth1). VCHA replicates data from the active node to the passive node on the HA network. The active vCenter database is replicated synchronously and the file system is replicated asynchronously. The passive node also has two interfaces; however, eth0, which contains the identical FQDN, IP, and MAC address, is dormant. This interface becomes active in the event of a failover. The final piece of the VCHA architecture is the witness node. The witness is utilized for quorum services, informing the cluster which nodes should be active at any given time. All three nodes must be online and be functioning for a healthy cluster.
In a failover event, eth0 of the passive node is brought online. A gratuitous ARP will be performed to notify the network that the passive node has now become active and taken over the FQDN, IP and MAC address. After failover, if the failed node can be brought back online, replication will resume. If the original node cannot be brought back online, the node can be removed from inventory and redeployed.
Requirements
- vCenter Server Appliance 6.5
- vCenter Standard licensing.
- vCSA deployment size small or larger (no tiny for production).
- Embedded or external PSC supported.
- ESXi 5.5 or later
- Three (3) hosts recommended.
- vCenter HA Network
- Must be on a different subnet than the management network.
- Less than 10ms network latency between nodes.
- Nodes must have static IP addresses.
Configure vCenter High Availability
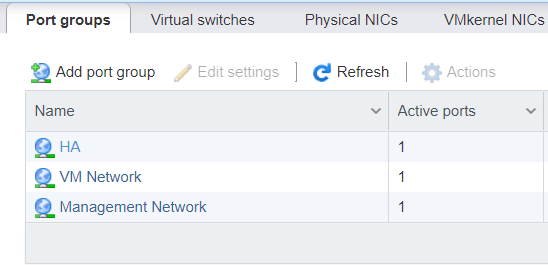
To begin, create the vCenter HA network. For our example, we added an HA port group to an existing virtual switch. Since we are using standard virtual switches, the HA port group was added to all three hosts.
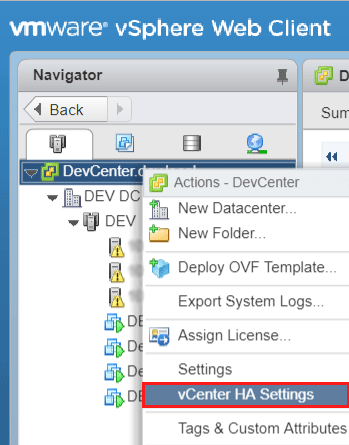
Once the network has been setup, right-click your vCenter Server from the Navigator hierarchy in the Web Client. Select the vCenter HA Settings option.
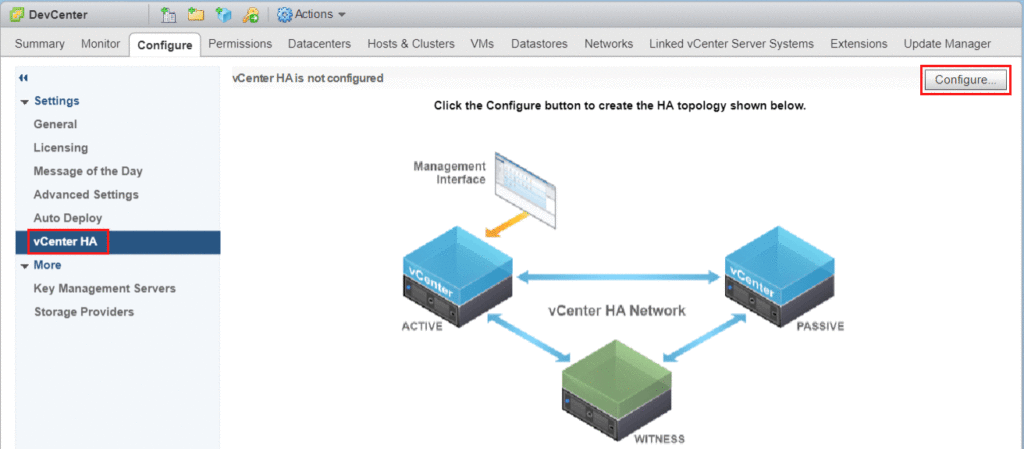
Click the Configure button from the vCenter HA menu.
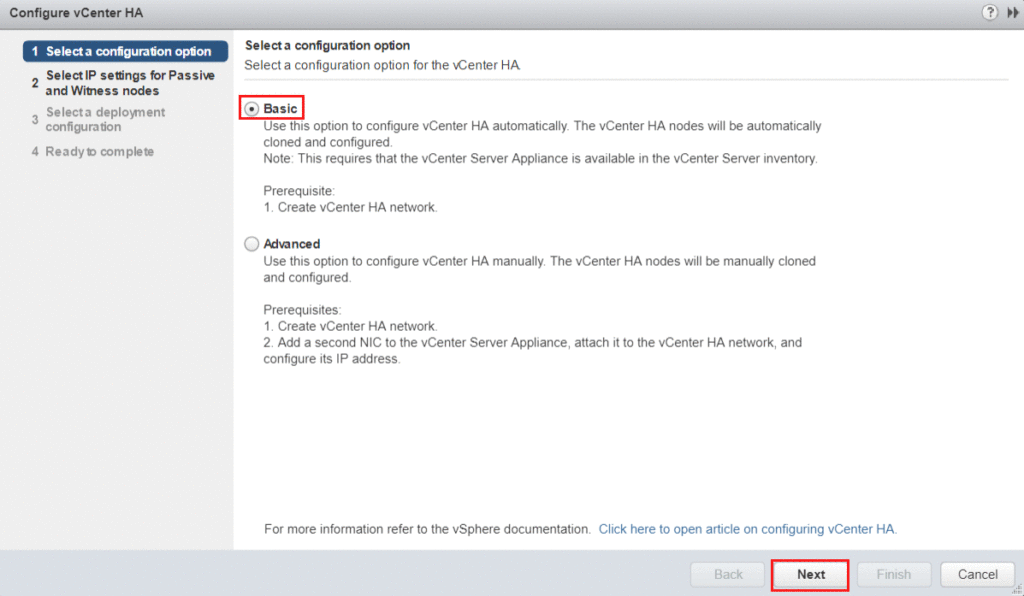
Select the appropriate configuration option. This tutorial will focus on Basic configuration.
- Basic Configuration will automatically clone and configure the nodes.
- Advanced Configuration will give you more control over the deployment. You will need to manually clone and configure the nodes.
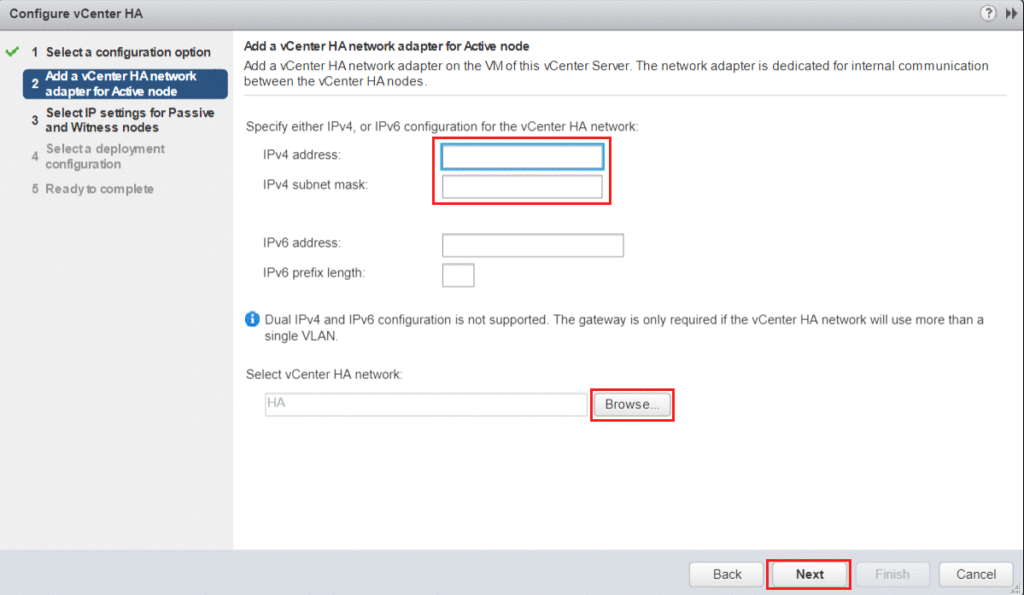
Next, specify the IP address and subnet for the Active node. Additionally, select the previously created vCenter HA network.
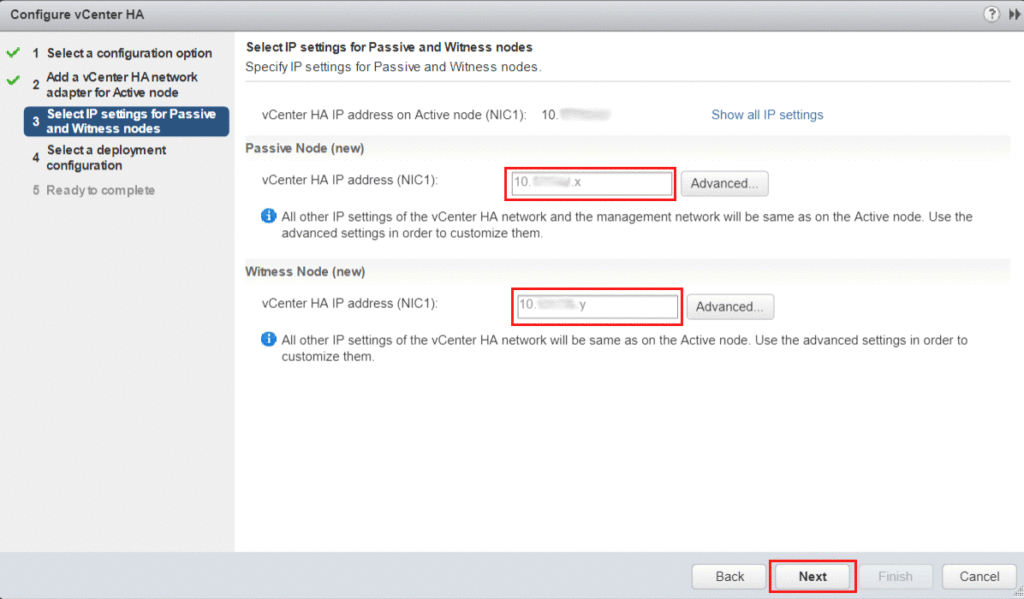
Enter the IP address for the Passive and Witness nodes.
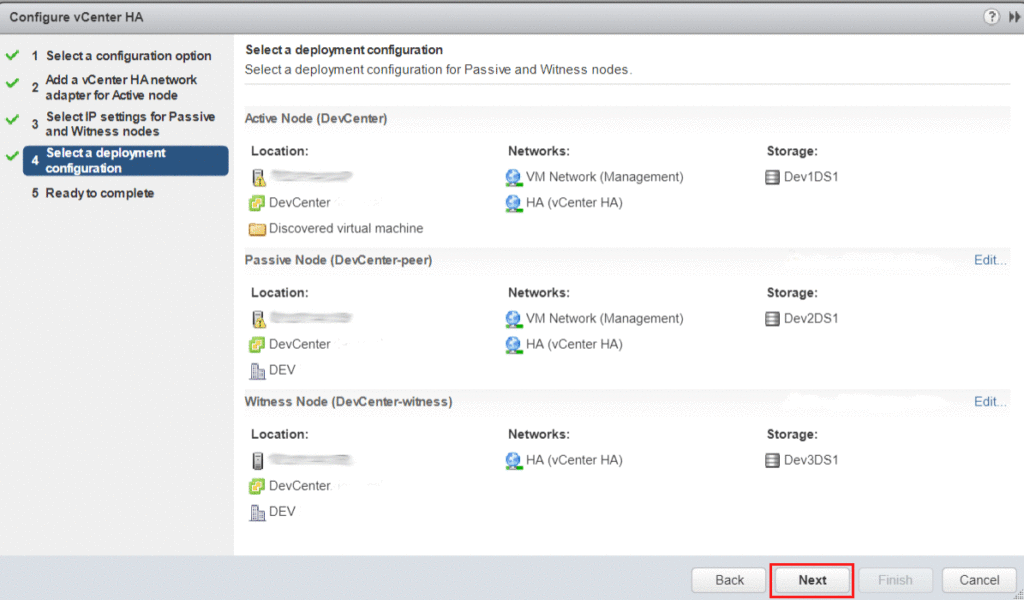
Examine the deployment configuration. Make any required Location, Network, or Storage changes to the Passive and Witness nodes before advancing.
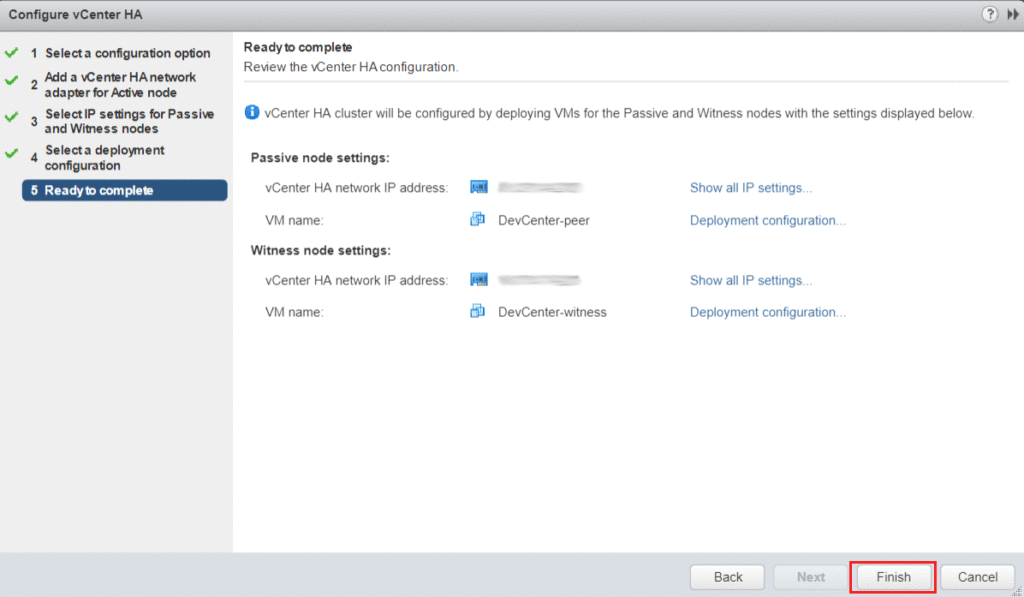
Review the final vCenter HA configuration. Click Finish to begin the deployment.
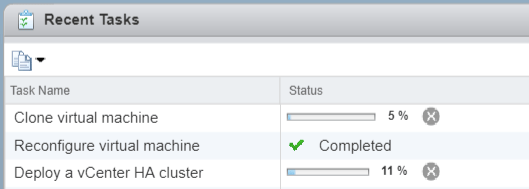
Monitor deployment progress under Recent Tasks. Nodes are cloned and configured automatically during this process.
Once the deployment has completed, three vCenter nodes will be running in inventory. The passive and witness node names will be appended with –peer and –witness, respectively.
VMware Docs – vCenter 6.5 HA
