How to Remove or Assign Brocade Port Licenses
Release and Reserve a Brocade Port License from CLI
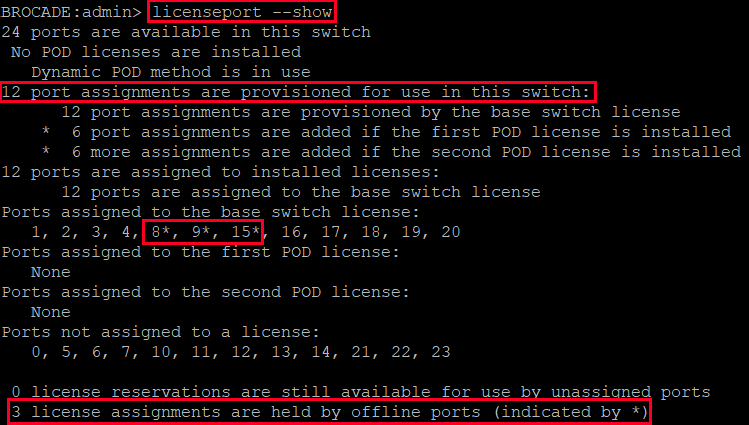
To kick this process off, SSH to your Brocade switch and run the licensePort –show command.
A couple of items to take note of here. First, we can see that we have 12 licenses for use on our switch. In addition, we can see we have three ports that are offline but are licensed. In our instance, we want to assign one of the offline port licenses to a different port.
To do so, we will disable a licensed offline port, release the license from that port, and assign/reserve the new port with a license.
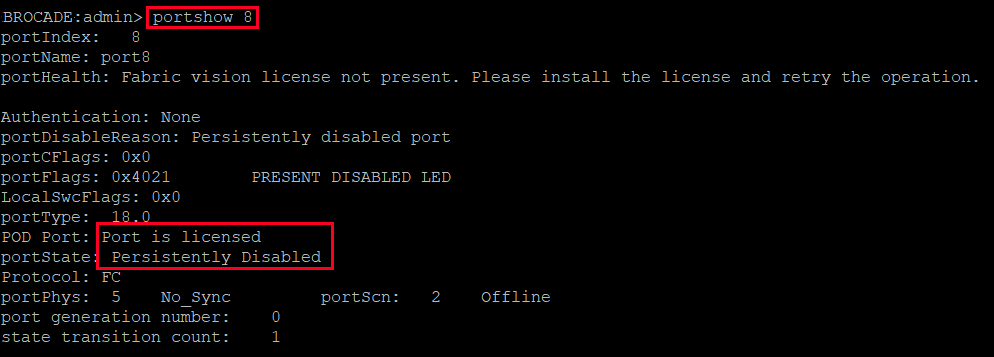
To start, we will verify details for the port where we will eventually disable and remove the license. Run the portShow <portnumber> command. For our example, the port in question is 8.
portShow 8
Here we can see that the port is licensed and already disabled. If the port had not been disabled, run the portDisable <portnumber> command.
Next, we will release the port from the POD set, effectively releasing the license back into the pool. This is achieved by running the licensePort –release <portnumber> command.
licensePort –release 8
![]()
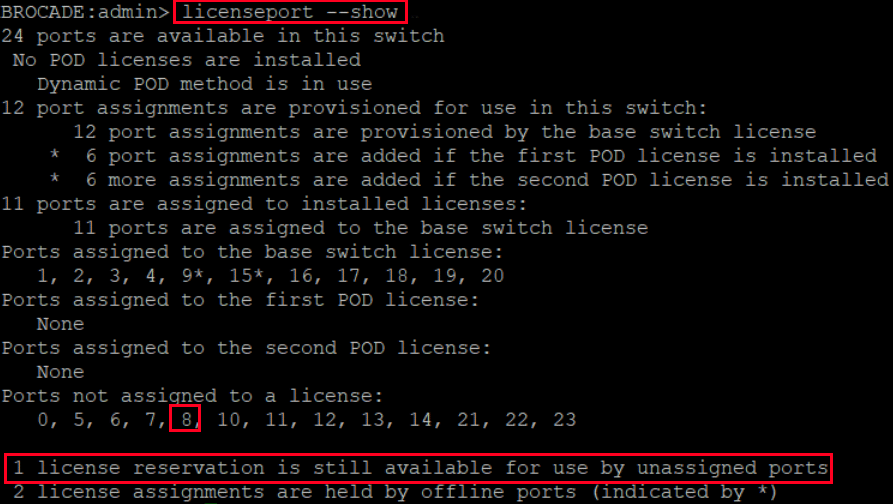
Run the licensePort –show command to verify the license has been removed from the port.
We now see port 8 is not assigned a license and we have 1 license reservation for use by unassigned ports.
Now, we will assign/reserve the freed up license for port 5. To do so, run the licensePort –reserve <portnumber> command.
licensePort –reserve 5
![]()
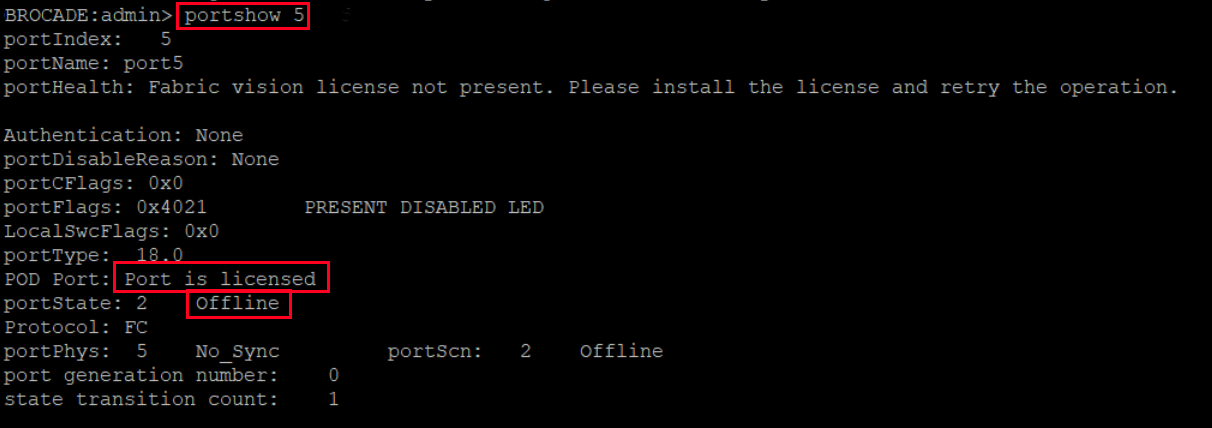
Run the portShow command to ensure the port is licensed.
We see the port is licensed, but still disabled.
Let’s enable the port by running the portEnable <portnumber> command.
![]()
Executing the portShow command, we can verify the port is Active and Online.
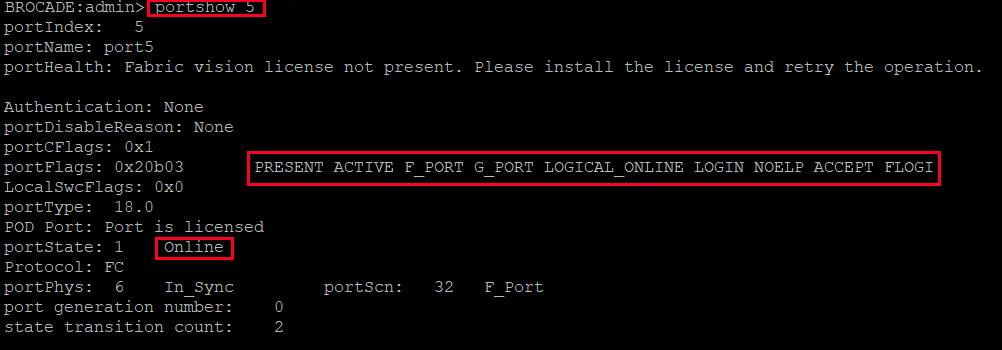
Ensure you perform this process on both Brocades.
Release and Reserve Brocade Port License from GUI
If the GUI is more your speed, you can also move licenses via the management console.
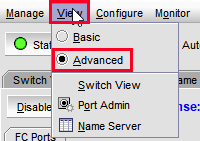
To begin, log into the Brocade management console. Next, enable the Advanced View by clicking the View menu item and selecting the Advanced radio button.
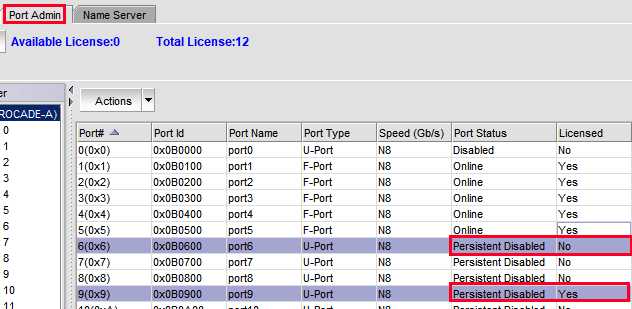
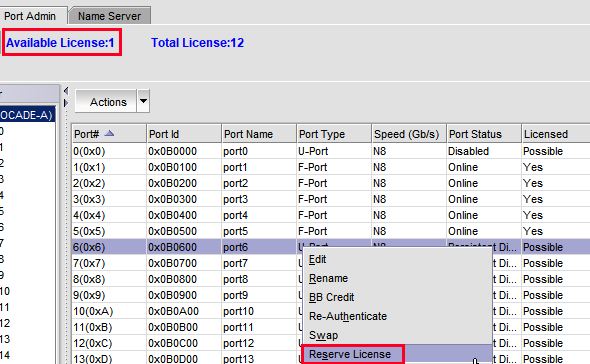
From the Port Admin tab, we can gather the pertinent information. In our example, we know we want to license and enable port 6. Here we can see the port is disabled and not licensed. Additionally, we know we want to release the license from an unused/disabled port; specifically port 9.
First, we will remove the license from port 9 by right-clicking the port and selecting Release License.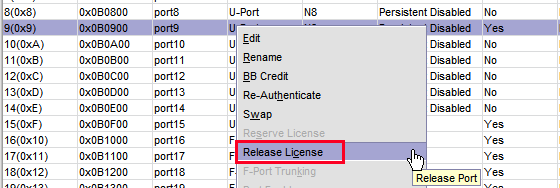
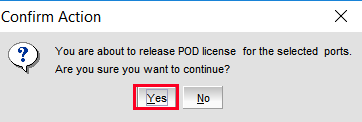
You will be prompted to release the POD license for the selected ports. Click Yes to continue.
Next, apply the available license to the new port by right-clicking the port and selecting Reserve License.
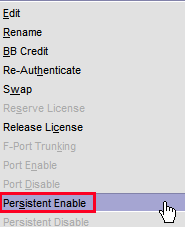
Lastly, enable the port by right-clicking the port and selecting Persistent Enable.
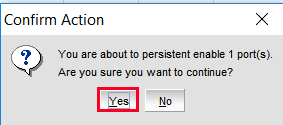
Select Yes to enable the port.
Perform this process on both Brocades.
NOTE – If you are zoning on a Brocade SAN Switch and you are unable to see the HBA WWN of a newly installed blade, port licensing is a good place to check.
Related Posts
3 thoughts on “How to Remove or Assign Brocade Port Licenses”
I needed to thank you for this good read!! I certainly enjoyed every little bit of it. I’ve got you bookmarked to check out new stuff you post
Outstanding documentation, thank you
Hi ,
Thank you this informations, I appreciate your efforts and have a question about the brocade licence. In case of replacing a failed switch, how we should save ports licences and apply them to new one
Comments are closed.