Shrink Windows Volume and Backing Hyper-V VHDX
Note – If the Windows Volume is not Basic or the VHDX is fixed, you will not be able to shrink them.
How to Shrink a Windows Volume
Log into the pertinent virtual machine. Right-click the start menu and select Disk Management.
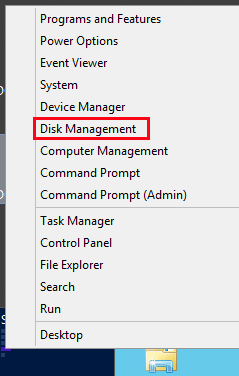
From the Disk Management Console locate the drive to shrink. In our case, it is the C: Drive. Right-click the drive and select Shrink Volume.

After the drive has been queried, you will be presented with the size available to shrink. Determine the size you would like to reclaim and enter that in the Enter amount of space to shrink in MB box. Note – This is the amount of space you want to remove from the volume. In our case, we would like to shrink approximately 100 GB. Click Shrink to start the process.
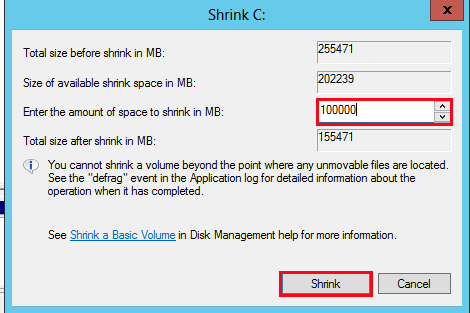
After the Shrink has completed, we can see that our newly Unallocated space.

Next, we will shrink the underlying VHDX to reclaim the unallocated capacity.
How to Shrink a Hyper-V Virtual Hard Disk (VHDX)
Open Hyper-V Manager, right-click the appropriate Virtual Machine and select Settings.

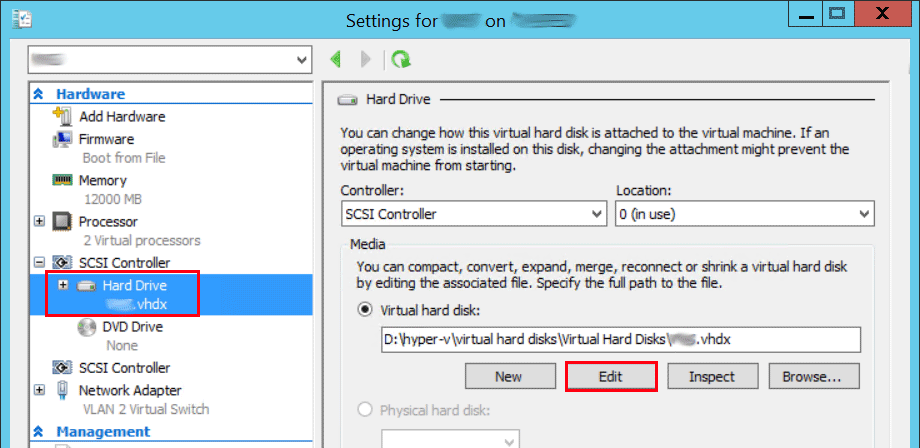
Select the virtual machine Hard Drive. Under the Virtual Machine Hard Drive options, click Edit.
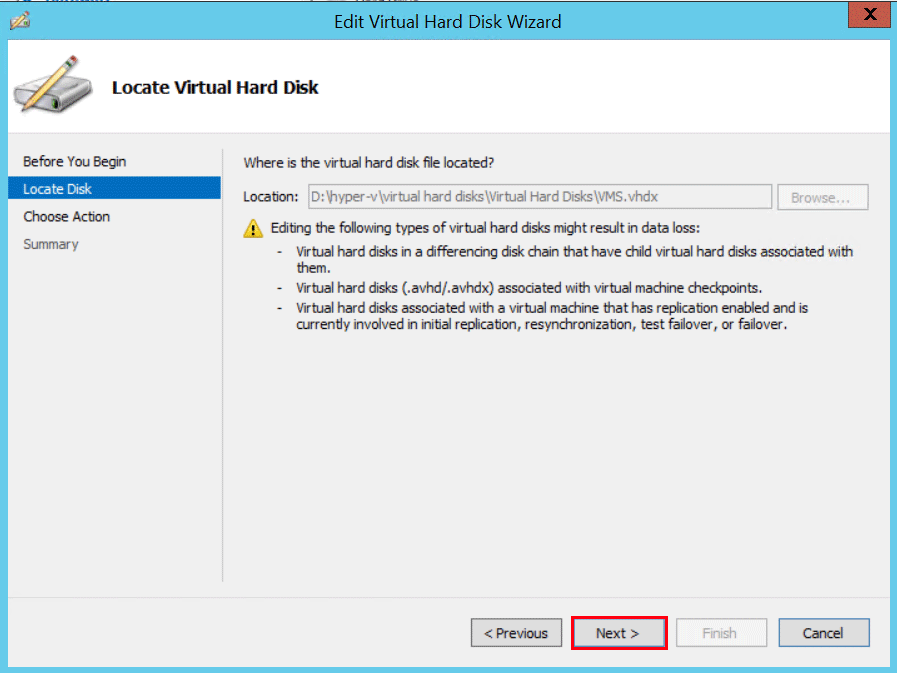
Ensure the correct VHDX is located. Press Next.
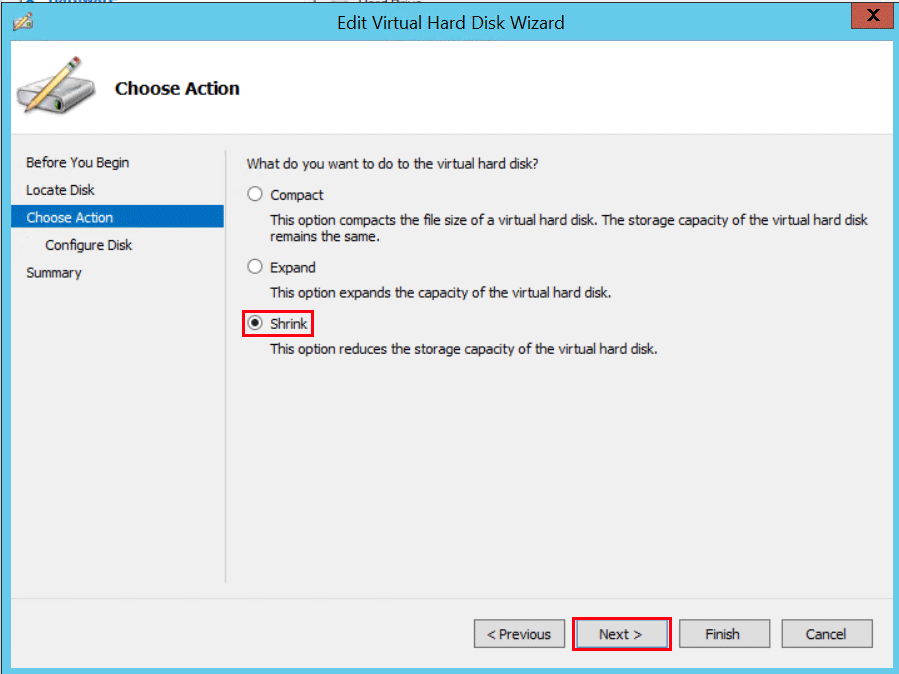
Under Actions, select the Shrink option. If you do not see the Shrink option, there is most likely no unallocated space to reclaim.
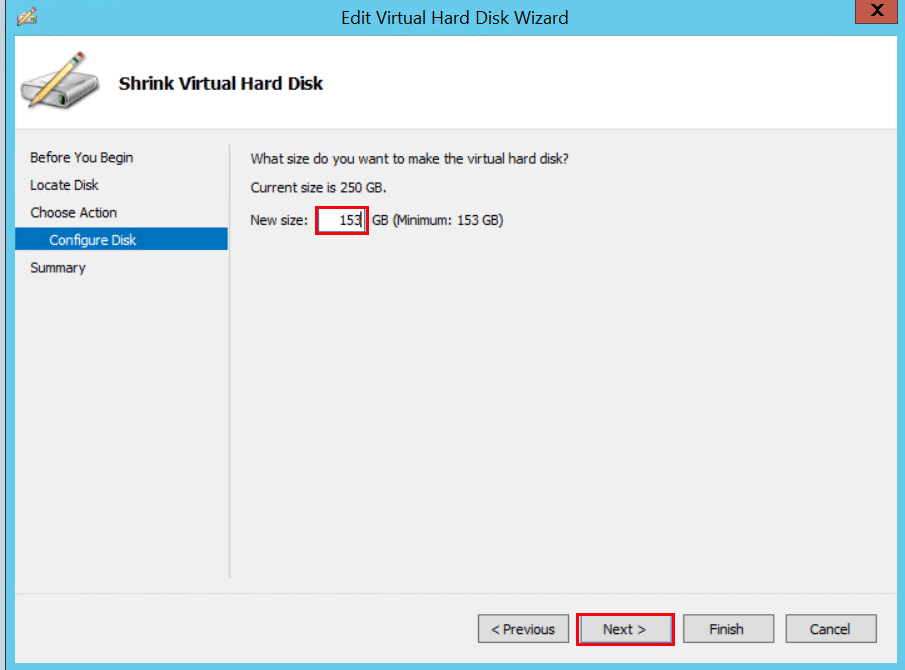
Next, enter the size you would like to make the disk. Note – This is not the size you want to shrink the disk by, but the size you want the disk to be. Select Next.
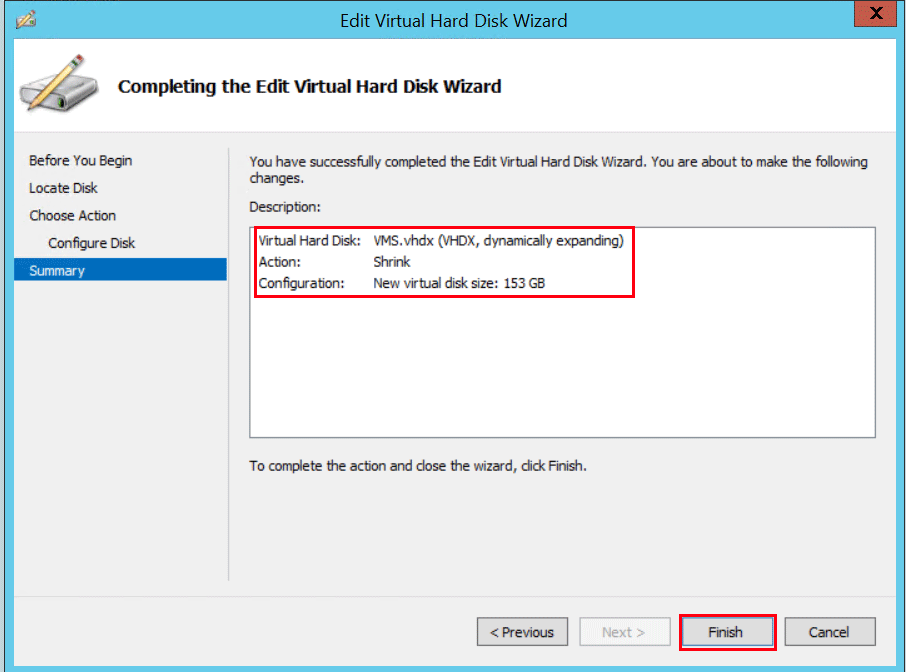
Lastly, you will be presented with a Summary indicating the Disk, Action, and New Size. If everything looks correct, click Finish.
Once the process has completed, we can go check the Windows Volume and see it has been correctly re-sized.

Related Posts