Install or Upgrade VMware ESXi from CIMC HTML5 UI
In this post, we will take a look at a VMware ESXi upgrade utilizing the HTML based CIMC and KVM console.
Attach ESXi Image via CIMC KVM
From the CIMC home page, click Launch KVM and select HTML based KVM.

Once the KVM session has launched, click Virtual Media and select Activate Virtual Devices. This will activate a vMedia session which allows us to remotely map a local ISO.

Under Virtual Media, select Map CD/DVD.
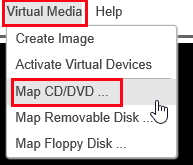
Browse to your ESXi ISO then select Map Drive.

If we go back to Virtual Media, we can now see our ISO has successfully mapped.

Boot from ISO image
Next, we will reboot the server in order to kick off the installation. Before we reboot, we must first set the server to boot from the mapped ISO Image. You can do this a couple of ways:
- From the KVM session select Boot Device and select the mapped image.

- From CIMC, navigate to the Compute Under BIOS, Configure One-time boot device.
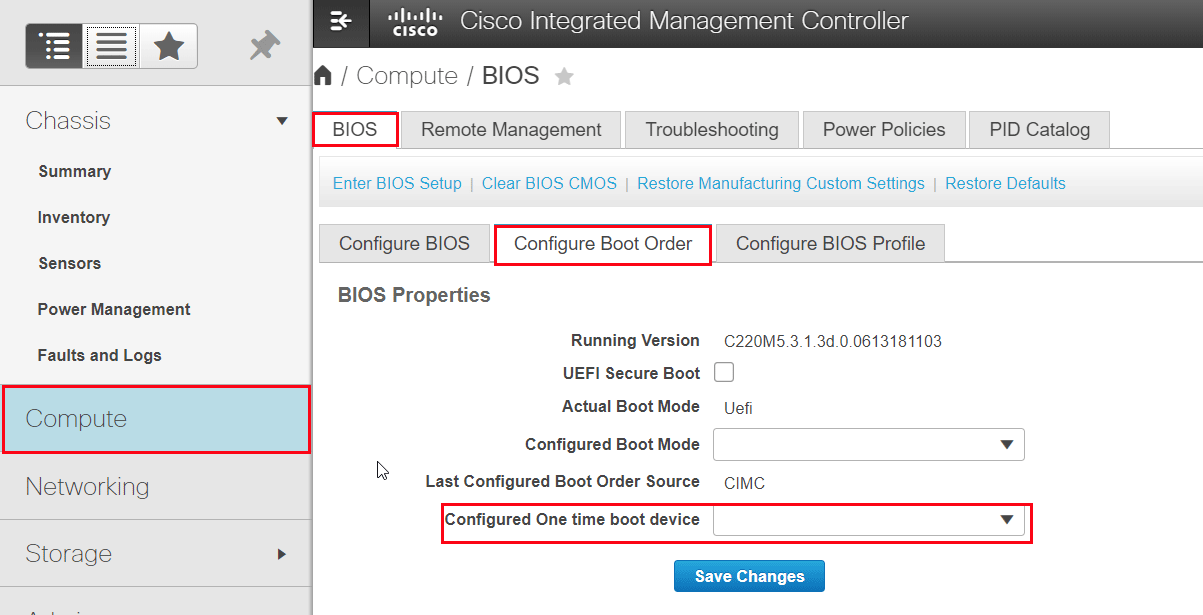
- Or upon reboot, enter the BIOS Setup F2 or Boot Menu F6. The boot can be set from either of these menus. Set the Boot Override (BIOS) or Boot Device (Boot Menu) to the Cisco vKVM-Mapped vDVD
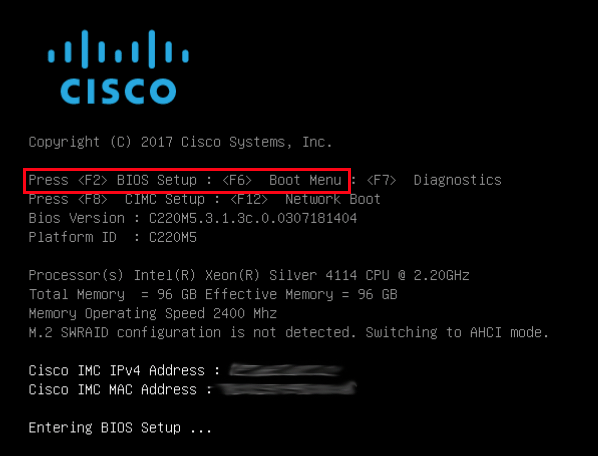
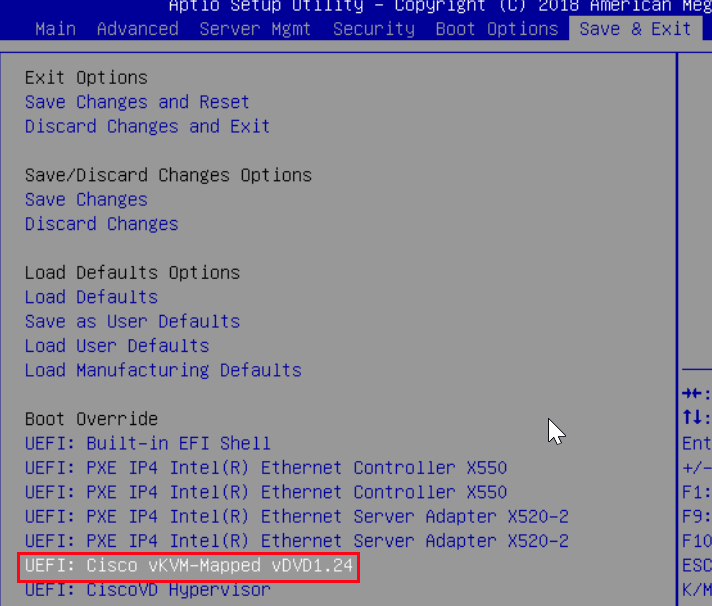
If you haven’t already, reboot the server by clicking Power Cycle System (Cold Reboot) under the Power tab of the KVM session.
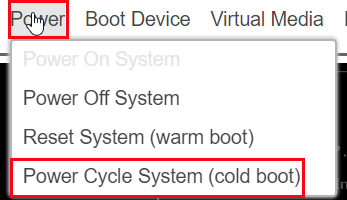
Install or Upgrade ESXi from CIMC HTML5
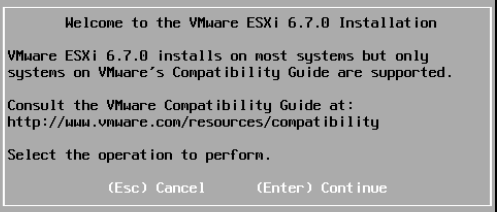
We can now begin the ESXi installation or upgrade process. Once the installer has loaded, continue the installation by hitting Enter.
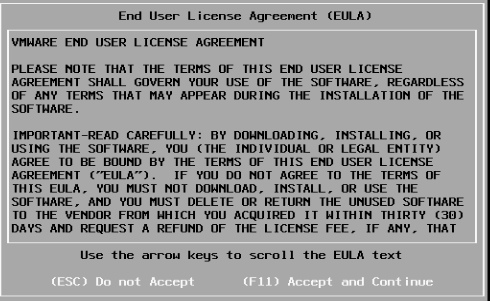
Accept the EULA by pressing F11.
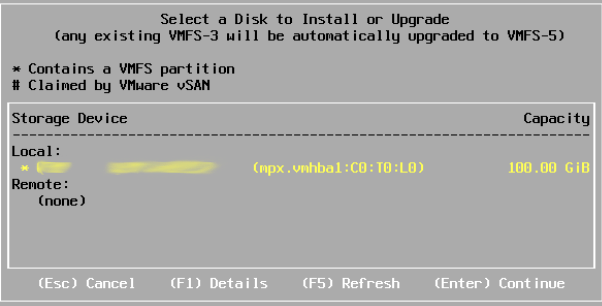
Select the Storage Device for the ESXi installation and press Enter. In our instance, we will be upgrading ESXi. Looking at the Devices we can see our storage already contains a VMFS partition.
As we are upgrading our ESXi installation, we have a few options to choose from:
- Upgrade ESXi, preserve VMFS datastore – Upgrades the in place ESXi installation and keeps the existing VMFS datastore.
- Install ESXi, preserve VMFS datastore – Installs a fresh version of ESXi and keeps existing VMFS datastore.
- Install ESXi, overwrite VMFS datastore – Installs a fresh version of ESXi and overwrites existing VMFS datastore.
We are going to Upgrade ESXi and preserve the VMFS datastore.
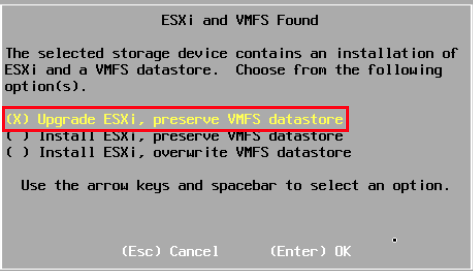
Press F11 to kick off your upgrade.

The upgrade will now commence.

Once the system has been upgraded, you will be prompted to remove the installation media before rebooting. 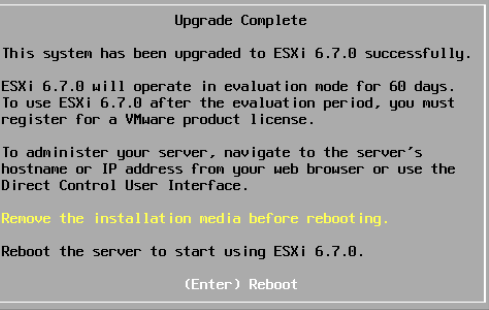
To do so, navigate back to Virtual Media and click the mapped ISO. Select OK when asked if you want to un-map the ISO.

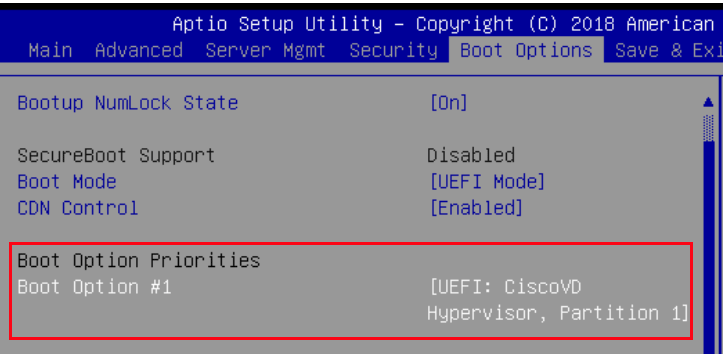
That is all for the installation. If you run into issues booting from the newly installed ESXi, check Boot Options Priorities and ensure it is set to the hypervisor.
Related Posts
One thought on “Install or Upgrade VMware ESXi from CIMC HTML5 UI”
Thanks for the help with the installation. My issue was that it wasn’t set to the hypervisor and it fixed it.
Comments are closed.