How to Change a VMware Network Adapter
In this post, we will discuss the process of changing a VMware network adapter; specifically removing an E1000 adapter and adding a VMXNET 3 adapter on a Windows virtual machine.
The VMware compatibility list verifies that e1000 network adapters are not supported for both Windows Server 2012 and 2016. VMware recommends VMXNET 3 adapters for these operating systems.
That being the case, we will begin our process by identifying virtual machines and their network adapters through PowerCLI. If you prefer not to use PowerCLI, RVTools can also give you a list of vms and their nics.
Export Network Adapter List via PowerCLI
First, connect to vCenter utilizing Connect-VIServer cmdlet in PowerCLI. More information on the basics of connecting to vCenter with PowerCLI can be found here.
Connect-VIServer -Server DevCenter -User administrator -Password pass
Once we are connected to vCenter, we will use the PowerCLI Get cmdlet to retrieve a list of virtual machines in vCenter; selecting the virtual machine names, guest operating system and network adapter type. The Get-NetworkAdapter cmdlet will return the set of virtual network adapters assigned to our virtual machines. Finally, the results exports to csv sorted by network adapter type.
Get-VM |
Select Name,
@{N=”InstalledOS”;E={$_.Guest.OSFullName}},
@{N=’NetworkAdapter’;E={[string]::Join(‘,’,(Get-NetworkAdapter -Vm $_ | Select-Object -ExpandProperty Type))}} |
Sort-Object -Property NetworkAdapter |
Export-Csv C:\NICreport1.csv –NoTypeInformation
Since a VM can have multiple Network Adapters, the example uses the .NET Join method to convert the individual values into one string separated by commas. Feel free to remove the Join. I keep it in for a cleaner look.
Once exported, the CSV will look similar to the following.
Now that we have a list of machines, we can go through and change the pertinent machine’s network adapters.
Change Network Adapter from E1000 to VMXNET3
There are a few items to note before we begin.
- Ensure your guest OS and ESXi supports the VMXNET 3 adapter by checking the VMware Compatibility Guide.
- For the VMXNET 3 driver to be available, VMware Tools must be installed on the virtual machine.
- Take note of the IP configuration and MAC address of the current adapter.
- By default, the new adapter will have a new MAC address. I’ve run across a few applications that associate licensing with the adapter’s MAC address; therefore, check if applications are utilizing the MAC. VMware will also let you manually enter a MAC to circumvent the issue.
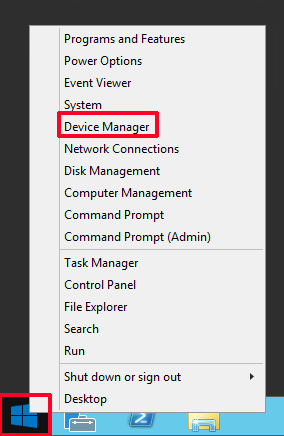
First, we are going to uninstall the existing network adapter from the Windows guest OS. To do so, console to the machine and navigate to the Device Manager. Get here by right-clicking the Windows start icon and selecting Device Manager.
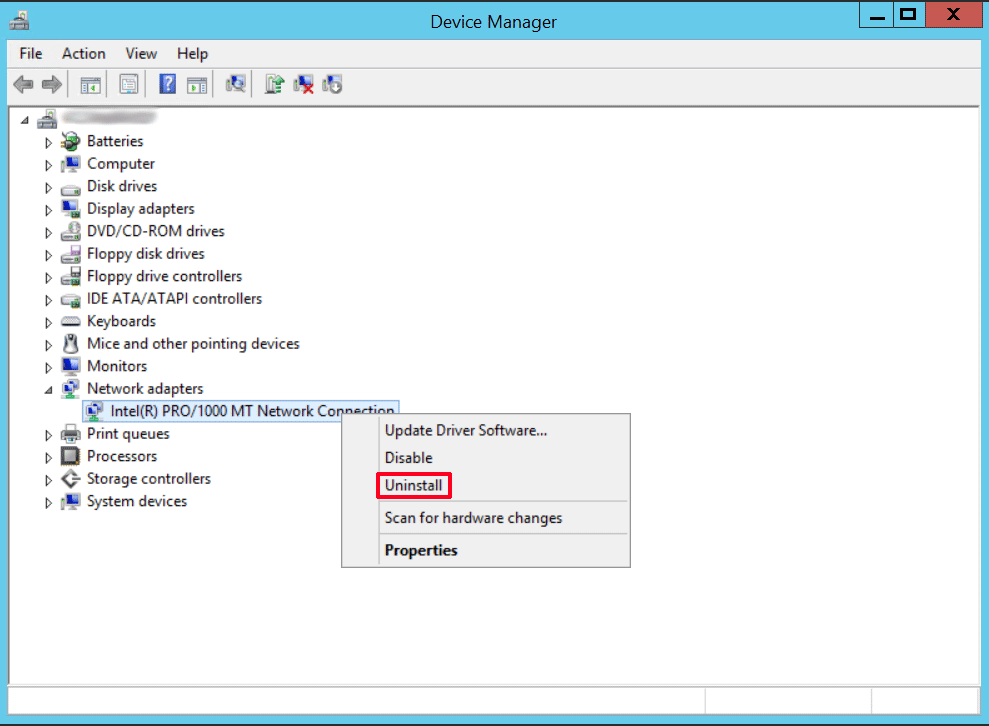
In Device Manager, expand Network Adapters, right-click the appropriate adapter, and select Uninstall.
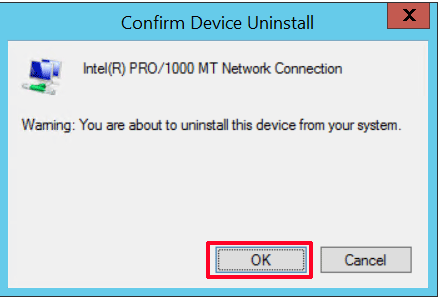
A warning will appear to confirm the device uninstall. Select OK.
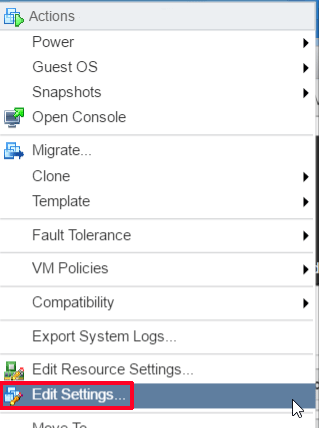
With the adapter uninstalled from the guest OS, we will remove the adapter from the virtual machine through the vSphere Client. Once logged into vCenter or the host, locate the virtual machine and Edit Settings.
From Edit Settings, expand the network adapter and click the X to remove the adapter.
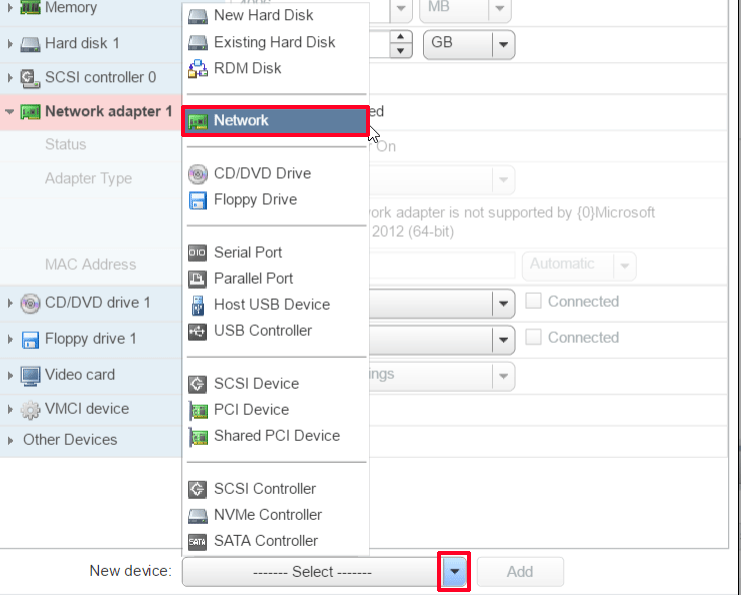
Next, click the New Device arrow at the bottom of the Edit Settings window. Locate and select the Network option.
Press the Add button to add the network adapter.
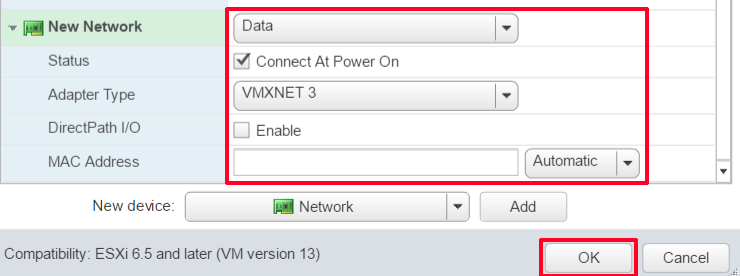
A new network adapter will appear. Select the pertinent network, connect at power on, and the VMXNET 3 adapter type. Additionally, you can choose to generate the MAC address automatically or switch the option to manual to enter your own. Click OK when finished.
In recent tasks, you will be able to monitor the re-configuration process.
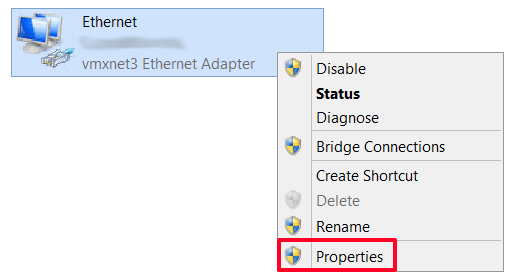
Once complete, navigate back to the virtual machine console and re-enter the pertinent IP settings for the new network adapter.
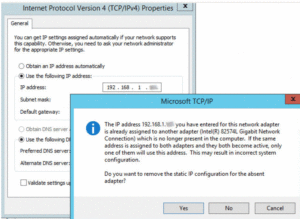
NOTE – If you didn’t previously uninstall the network adapter from Windows and attempt to utilize the same IP address, Windows warns you it is already assigned to another adapter.
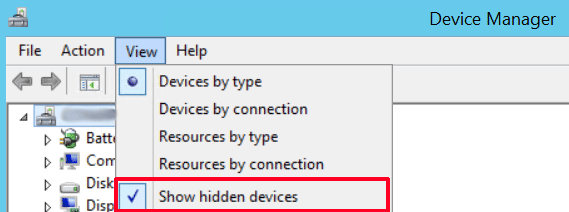
Locate the old network adapter for removal by clicking show hidden devices through Device Manager.


